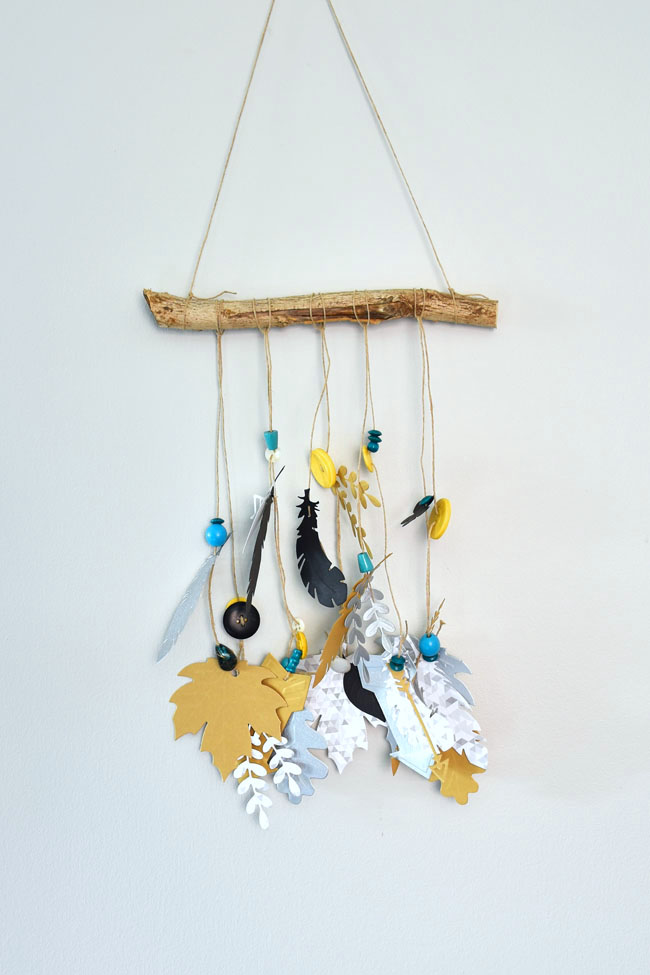
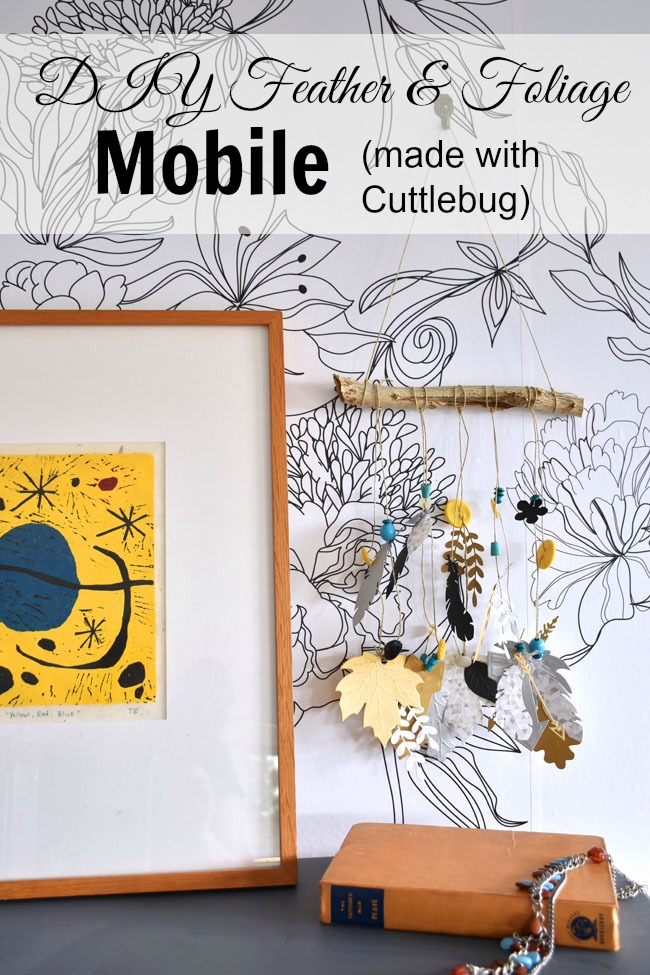
Crafting has become a whole lot more fun since I got a Cricut Explore Air cutting machine. And recently I added a Cricut Cuttlebug® machine to my crafting arsenal for a whole new range of DIY possibilities. For my first Cuttlebug project I decided to celebrate beautiful, glorious summer with an abundant, colourful, nature-inspired DIY mobile.
My sweet little mint-coloured Cuttlebug is a die cutting and embossing machine that is small, portable and hand-cranked, meaning you can easily pop it into your bag and take it to the cottage or trailer. It works without electricity, my friends! How many things can you say that about nowadays? You can cut and emboss a variety of materials with the Cuttlebug, including cardstock, tissue paper and foils. You won't know how addictive the Cuttlebug is until you try it. Just ask my preteen daughter. We were cutting and embossing papers for days after we got our machine. One really cool feature of the Cuttlebug is that, when you open up the two sides, it creates a strong suction on the bottom so the machine holds tight to your table when you cut and emboss. It also has a collapsible handle so it takes up very little room on your crafting shelves.
Materials Needed for DIY Feather & Foliage Mobile
*This project is based on a photo on the Cricut site on the Feathers & Arrows Cut & Emboss Die Set page.
- Cuttlebug® Machine
- 6x8 A Plate
- 2 6x8 B Plates
- 6x8 Rubber Embossing Mat
- 6x8 Magnetic Cutting Mat (optional)
- Feathers & Arrows Cut & Emboss Die Set
- Seasonal Foliage Cut & Emboss Die Set
- Cricut® Cardstock, Black
- patterned cardstock (I used a geometric silver print I got at a craft store)
- gold and silver cardstock
- buttons and/or beads
- hemp string
- branch or dowel
- Cricut weeder for weeding pieces out of dies and for poking holes in cut-outs
- scissors (for cutting string)
- hole punch (for punching holes in larger cut-outs)
- glue stick (to glue some of smaller cut-outs to others)
- ruler or measuring tape to measure hemp string
When I first got the Cuttlebug, the order of the plates was a source of some confusion to me. But there is a guide that comes with the machine that outlines the order. To cut from cardstock using the dies, the order from bottom to top is the A plate, magnetic mat (keeps the dies in place) or rubber embossing mat, B plate, dies, cutting material (if paper is one-sided, put the good side down for embossing later), B plate.
Then, just squeeze all the layers together and run them through the Cuttlebug, rotating the arm on the side. Don't be alarmed if you hear crunching and cracking sounds. The cutting process will leave etchings in your top B plate, but you can keep right on using it.
To emboss, keep the cut paper inside the dies. Put aside the unneeded paper. Put it back together in this order (from the bottom): A plate, B plate, dies with cut paper inside, rubber embossing mat and B plate.
Run the whole pile back through the Cuttlebug again one time. It should go more smoothly for the embossing.
Take a moment to get giddy over how cute the cut out and embossed little shapes are. The Cricut weeder will help you to gently push out the cut shapes from the dies if needed.
Once you have cut out and embossed a whole bunch of shapes from the various colours and patterns of cardstock, begin assembling the mobile. Tie lengths of hemp string to the dowel or branch. I cut five lengths of hemp string each to 27". Fold a length of hemp string in half and lay the centre loop under the branch.
Run the two ends of the string through the loop and tighten.
String on buttons, beads and paper shapes (using the hole punch or Cricut weeder to carefully punch holes through the paper). Once finished, tie the two ends of the string in a knot behind the final paper cut-out shape.
I used a subtle colour scheme of gold, silver and black paper, with yellow and teal beads and buttons. I spent about $4 on paper at the craft store and I used beads and vintage buttons that I had in tins in the basement. I got the hemp string at a dollar store for under $2. The branch is from our yard.
I made the mobile on the small side so I can switch it out with the yarn wall hanging above my newly painted dresser after our mini bedroom makeover.
What tools and accessories do I need to use a Cricut and how much do they cost?
The Cuttlebug is a nice-to-have accessory to go along with your Cricut Explore Air™ machine (and also works as a stand-alone machine). But if you are just starting out with a Cricut (or thinking of buying one), you might wonder what tools and accessories you need to have in order to use the Cricut.
You will need a cutting mat to adhere your material to before you run it through the cutting machine. Cricut has three types of cutting mats with different grips - light, standard and strong, depending on which material you cut. Each of them comes in a 12"x12" size and a 12"x24" size. I tend to use the standard grip in the 12"x12" size most often. Mat prices vary depending on the size. A single 12x12 mat is regularly $14.99 USD on Cricut.com, but you'll probably want to take advantage of the cost savings of a variety 3 pack or a 2-pack of standard mats to start (to supplement any mats that may have come with your machine). The stickiness of the mats wears away with repeated use, so it's best to get extra mats at a reduced cost.
Once you have a project in mind, something cool from Cricut Design Space™ perhaps, you'll need the right material for the job - maybe it's cardstock or vinyl or iron-on material. In terms of tools, the basic tool set ($24.99 USD) is a good start. Or, you might want to choose the larger essential tool set for $49.99 USD. Both sets include Cricut scissors - they are amazing little scissors that I end up using for non-Cricut projects because they work so well. Tools such as the tweezers, weeder and spatula can help when working with delicate material or cuts such as small lettering. The essential tool set also includes a high-quality paper trimmer with a replacement blade and a scoring blade that's great when making greeting cards. Personally I would put a bunch of Cricut-related stuff on my birthday, Mother's Day or Christmas wish lists for the family to pick up. If only you could register for this stuff...
To review - machine, mat, cutting material and tool set - that's going to get you off to a great start in terms of tools and accessories needed to use your Cricut. Prices vary depending on where you buy your supplies and when (look out for sales!).
If you plan to create greeting cards and invitations, you'll also want a scoring stylus - it goes right into your Cricut machine and scores fold lines on cards and envelopes. A selection of Cricut pens (which also pop right into the special housing on the machine) are great to have, because the Cricut machine can do the work of writing on your cards for you. The metallic pens are particularly lovely.
Here's another fun, simple feather mobile project in Cricut Design Space. It calls for upcycling an old ruler! Pretty cool.
Have you tried the Cricut Cuttlebug?
An easy Cricut Project:
This simple iron-on tote bag is a great beginner Cricut project. In this post, I also outline some of the materials you can cut with the Cricut.
Pin it for later:
This is a sponsored conversation written by me on behalf of Cricut. The opinions and text are all mine.
*This post contains affiliate links. If you make a purchase after following a link, Woman in Real Life may earn a small commission. Your price is not affected.


Hi Joann,
ReplyDeleteI love this mobile! How unique. It looks wonderful against the new wallpapered wall.
Thanks so much Gabriela!
DeleteLove this idea! My girls would love to make something like this for their rooom.
ReplyDeleteThank you for your kind comment. This is definitely a fun project for a girl's room. :)
Delete